The Price of Prophecy (Production)
Pathfinder Second Edition

Snapshot · Oct 28, 2026, 6:09 PM

  • The Price of Prophecy (Production)
    • narrativeCampaign Primer
    • narrativeThe Lore of Druma
    • Module artifacts
      • folderGuides
        • handoutLevel 1-2 Treasure Menu
        • handoutLevel 2–3 Treasure Menu
      • folderTreasures
        • itemCedar Whisper Charm
        • itemBrassbound Hero’s Mark
        • itemAmberglass Reagent Case
        • itemLantern of Last Echoes
        • itemThuld’s Pattern Awl
        • itemSeal of the Fair Measure
        • itemVotive of the Second Vigil
        • itemVeiled Current Pin
        • itemEcho-Ward Wristlet
        • itemStillwater Step Anklet
        • itemHarbor-Chorus Brooch
        • itemAshborn Resolve Torque
        • itemBrass Signal Clasp
        • itemMosswake Circlet
        • itemEdgekeeper Knot
        • itemIron-Shelter Rivet
        • itemCinderline Sight
        • itemGilt Calibration Key
        • itemInquest Lens
        • itemConfluence-Thread Sash
        • itemTarnished Omen Coin
        • itemHushglass Diadem
        • itemThornpath Compass
        • itemEmberblood Signet
        • itemTwinned Thread Pendant
        • itemGilt Wake Sash
        • itemQuiet Ledger Reliquary
        • itemHearthroot Needle
        • itemWarded Margin Bookmark
      • folderHandouts
        • handoutThe Palakar Forest & The Town of Macridi
        • handoutTar Taargadth
        • handoutOath of Everlasting Friendship
        • handoutBlood Price Economy
        • handoutDruma - Profit and Prophecy
        • handoutNew Macridi
        • handoutThe Blight of 4719
        • handoutNew Macridi — Magical Services
        • handoutThe Legacy of Thuld
      • folderItems
        • itemAlchemical Reagent Bundle
        • itemInfernal Blight Reagent Bundle
        • itemCedar Court Amber
      • folderImages
        • imageGolden Hand Seal
        • imageGolden Hand Stamp
        • imageThe Quiet Current Seal
      • folderMaps
        • mapDruma WikiPath
        • mapOld Macridi
        • mapMacridi Area
        • mapDruma Detailed
        • mapNew Macridi (blocks)
        • mapKerse
        • mapNew Macridi
        • mapNew Macridi (blocks color)
        • mapPetitioner's Port
        • mapAlabastrine Map
      • folderPages
        • pageThe Price of Prophecy - PC Guide
        • pageCampaign Arc (FULL Spoilers)
        • pageCampaign Arc (FULL Spoilers) (new CSS)
        • pagePlayer Primer • Pulgari Estate<
        • pageGM Primer • Pulgari Endgame
        • pagePlayer Reference - Lores
        • pageTreasure, Reagents, and Party Size
      • folderMonsters
        • monster blockMacridi Blade Warrior
        • monster blockWood Wraith
        • monster blockSpeaker of the Pale
        • monster blockAnimated Log Servant
        • monster blockBarrow Clay Sentinel
        • monster blockInfernal Blightseed Swarm
        • monster blockInfernal Rootling
        • monster blockInfernal Thornling
        • monster blockInfernal Treeling
        • monster blockInfernal Blight Stalker
        • monster blockInfernal Blight Reveler
        • monster blockBrimorak Demon
        • monster blockOrt (Drudge Devil)
        • monster blockGOLDEN HAND MERCENARY
        • monster blockGOLDEN HAND ARCHER
        • monster blockForeman Hendrik
      • folderBlight Infestations
        • monster blockBlightroot
      • folderArticles
        • articleCedar Court
        • articleCourt of Seasons
        • articleDesolation Blade Mounds
        • articlePulgar Estate v2
        • articlePulgari Estate
        • articleReiver's Right
        • articleMacridi
        • articleMacridi Blades
        • articleCourt of Endless Revelry
        • articleMammon: The Argent Prince
        • articleInfernal Blight — Progression
        • articleThe Quiet Current
      • folderPDFs
        • pdfDruma_and_Northern_Shining_Kingdoms_Player_Reference
      • folderRecaps
        • narrativeStart to 10/28
    • Acts
      • actA1Investigating Reiver's Right
        • narrativeOverview
        • sceneS1Briefing at Karland's Sawmill
          • narrativeMain
          • handoutInvestigate Reiver's Right
          • encounterE1Meeting Danum Karland
            • narrativeMain
            • challengeMeeting Danum Karland Challenges
            • imageBlighted Log
            • checklistTakeaways from Karland's Sawmill
            • sidebarGM Notes
          • checklistKarland's Sawmill — Contract
        • sceneS2Around Town Macridi
          • narrativeMain
          • mapOld Macridi (Unmarked)
          • mapOld Macridi
          • encounterE1Karland's Sawmill
            • narrativeMain
          • handoutOld Macridi — Spellcasting Services
          • encounterE2Fanciful Inquiries
            • narrativeMain
            • sidebarBuying Maps
            • shopFanciful Inquiries — Shop Menu
          • encounterE3The Gilded Ledger Tavern
            • narrativeMain
            • challengeE3 — The Gilded Ledger Tavern Challenges
            • handoutRecover the Boles
          • encounterE4The Salty Bark Tannery
            • narrativeMain
          • encounterE5Sanctitude Saunas
            • narrativeMain
            • articleThe Empty Private Chamber
          • encounterE6The Iron-Root Apothecary
            • narrativeMain
            • challengeAlchemist Rub
            • articleAlchemical Reagent Bundle
            • treasureIron-Root Apothecary — Alchemist Supplies
            • shopApothecary Alchemical Supplies
          • encounterE7Assembly Institute
            • narrativeMain
          • encounterE8The Veridical Scriptorium
            • narrativeMain
            • pageGM Primer • Hidden Conspiracy
            • handoutTakeaways from Veridical Scriptorium
            • challengeIdentify the Seal
            • imageGolden Hand Stamp
          • encounterE9The Watchmaker's Loft
            • narrativeMain
            • treasureWatchmen's Loft List
          • encounterE10Best Fit Furnishings
            • narrativeMain
        • sceneS3The Darkwood at Mudjaw Reach
          • narrativeMain
          • encounterE1Getting the Darkwood
            • narrativeMain
            • mapMudjaw Beach sketch
            • articleMudjaw Beach Field Reconnaissance
            • mapMudjaw Beach
            • monster block2× Balanced — 2× Reefclaw
            • monster blockBlue-Ringed Octopus
            • monster block2× Grindylow
            • monster block3× Mudjaw Lurebloom
            • sidebarMovement in the Shallow
            • handoutTactics
            • articleXP
        • sceneS4The North Road
          • mapNorth Road - Sketch
          • mapNorth Road - Detail
        • sceneS5Pulgari Estate Crossroads
          • encounterE1Golden Hand
            • monster block2x Golden Hand Mercenary
            • monster blockGolden Hand Archer
            • pageXP
            • pageRecall Knowledge
            • imageGolden Hand Crossing
        • sceneS6Reiver's Right
          • encounterE1South Gate (North Road)
            • narrativeMain
          • encounterE2Gatehouse
            • narrativeMain
            • letterLeft for Anyone Who Comes After
            • trapGatehouse Snapbow
            • mapGatehouse Interior
          • mapReiver's Right Sketch
          • encounterE3Central Yard
            • narrativeMain
            • monster block4× Hardwood Scamp
          • encounterE4Foreman's Hall / Camp Hall
            • narrativeMain
            • monster blockForeman Hendrik
            • monster block2× Infernal Rootling
            • pageTactics — Hendrick and Two Infernal Rootlings
            • sidebarThe Corruption of Foreman Hendrick
            • treasureForeman Hendrick's Log Book
            • letterForeman Hendrick's Log Book
            • treasureGolden Hand Log Book
            • letterGolden Hand Log Book
            • treasureHidden Compartment - Golden Hand Log Book
            • mapCamp Hall Inside
            • treasureInvestigator's Field Kit — Lantern and Awl
            • shortcutLantern of Last Echoes
            • shortcutThuld’s Pattern Awl
          • mapReivers's Right Battlemap
          • encounterE5Cookhouse & Mess
            • narrativeMain
          • encounterE6Bunkhouses / Workers' Cabins
            • narrativeMain
            • narrativeHalven's Darkwood
          • mapReiver's Right Sketch (Unmarked)
          • encounterE7Storehouse
            • narrativeMain
            • trapRigged Cargo Collapse
            • mapStorehouse Battlemap
            • mapStorehouse Battlemap 2
            • pageDerrin Hale's Abandoned Satchel
            • letterDerrin Hale's Letter
            • treasureDerrin's Effects
          • pageWorkers Escape
          • encounterE8Smithy
            • narrativeMain
            • letterDarkwood Note
          • pageGM Notes for Party of 5, 2nd Level
          • encounterE9Stables
            • narrativeMain
          • pageFive Relics of Reiver's Right
          • encounterE10Sawpit / Sawyard
            • narrativeMain
            • mapSawpit/Sawyard Battlemap
            • mapSawpit/Sawyard Battlemap Placement
            • monster block4× Infernal Rootling
            • monster blockInfernal Thornling
          • pageThe Long Dividend
          • encounterE11Carpentry Shed
            • narrativeMain
          • imageThe Long Dividend Image
          • encounterE12Log Stacks
            • narrativeMain
            • monster blockWood Wraith
            • monster block4× Animated Log Servant
            • mapLog Stacks Battlemap
          • encounterE13Log Chute & Hoist
            • narrativeMain
            • mapLog Chute & Hoist Battlemap
            • pageThe Lower Works — Western Approach
            • mapCollapsed Tunnel Entrance to Lower Works
            • narrativeCollapsed Tunnel Entrance Notes
          • shopTallow's Odds and Ends
          • encounterE14Lower Landing / Dock
            • narrativeMain
          • pageTraveling Merchant · The Long Dividend
          • encounterE15Watchtower
            • narrativeMain
            • letterFound Letter
          • encounterE16Shrine of Erastil
            • narrativeMain
          • encounterE17North Track (to Ranger Road)
            • narrativeMain
          • subsceneSS1E18 - The Lower Works
            • narrativeMain
            • narrativeLower Works Overview
            • narrativeOverview
            • narrativeEncounter Scaling — 4 or 5 Level-2 PCs
            • encounterE18Concealed Entrance
              • narrativeMain
              • treasureLower Works Shift Key
            • mapThe Lower Works Map 2
            • mapThe Lower Works Map 2 Battlemap
            • encounterE18Access Ramp
              • narrativeMain
              • trapRunaway Ore Cart
            • encounterE18North Gallery
              • narrativeMain
              • mapE18-3 — North Gallery (GM Placements)
              • monster block2× Infernal Thornling
              • monster blockInfernal Rootling
              • sidebarRootling Reinforcement
            • encounterE18Ventilation Shaft
              • narrativeMain
              • trapVentilation-Shaft Collapse
              • treasureCrafter's Eyepiece
            • encounterE18Supply Depot
              • narrativeMain
              • treasureLower Works Emergency Cache
              • treasureStamped Supply Manifest
            • encounterE18Western Excavation
              • narrativeMain
              • monster block2× Barrow Clay Sentinel
              • treasureMacridi Blade Survey Token
              • treasureThe Barrow Reliquary
            • encounterE18Flooded Passage
              • narrativeMain
              • monster block2× Blue-Ringed Octopus
              • sidebarFive-Character Adjustment
              • trapFlood Surge
            • encounterE18Workers' Quarters
              • narrativeMain
              • treasureLower Works Crew Roster
              • treasureDerrin Hale Freight Chit
              • treasureWorkers' Lockbox
              • shortcutAmberglass Reagent Case
            • encounterE18Eastern Tunnels
              • narrativeMain
              • treasureAbandoned Survey Board
              • treasureHauling Crew's Pay Tin
            • encounterE18Deepest Dig
              • narrativeMain
              • treasureDeep Survey Ledger
              • treasureWarded Drill Core
              • treasureGolden Hand Transit Seal
              • mapE18-10 & E18-11 — Tactical Map (GM Placements)
            • encounterE18The Blightroot
              • narrativeMain
              • shortcutBlightroot
              • sidebarRunning the Blightroot Encounter
              • monster block2× Infernal Rootling
              • monster blockInfernal Thornling
              • sidebarFive-Character Adjustment
              • treasureFresh Blightroot Sample
              • sidebarBlight Terminology
        • sceneS7Epilogue to Reiver's Right
          • treasureConsolidated Treasure Menu - Lv1 - 2
      • actA2Kerse
        • sceneS1Corven Vell's Hideout
          • narrativeOverview
          • narrativeHook from Reiver's Right
          • narrativeRunning the Hideout
          • narrativeSecurity & Consequences
          • narrativeFinal Discovery
          • subsceneSS1H1 - Entry Hall
            • narrativeMain
            • trapVell's Courtesy Needle
          • itemCorven Vell's Comparative Assay Kit
          • subsceneSS2H2 - Conservatory
            • narrativeMain
            • trapIrritant Mist Manifold
          • sidebarAlchemical Treasure
          • subsceneSS3H3 - Preparation Laboratory
            • narrativeMain
            • trapVolatile Separation Bench
          • mapCV Hideout
          • subsceneSS4H4 - Specimen Gallery
            • narrativeMain
            • trapCompromised Specimen Case
          • mapCV Hideout Battlemap
          • subsceneSS5H5 - Study & Correspondence
            • narrativeMain
          • mapCV Hideout Sketch
          • subsceneSS6H6 - Lower Laboratory
            • narrativeMain
            • narrativeAfter the Fight
          • subsceneSS7H7 - Comparative Laboratory
            • narrativeMain
            • trapArchive Purge
            • monster block3× Animated Panoply
        • articleKerse Downtime
        • articleKerse Downtime 2
        • articleMacridi to Kerse by Boat
        • articleDruma — Dwarven Rivercraft
      • actA3The Cedar Court
        • sceneS1Getting to the Cedar Court
          • mapCedar Court - Surrounding Area
        • sceneS2The Cedar Court
          • mapCedar Court Sketch
        • sceneS3The Cedar Blightroot
          • subsceneSS1Companions
            • pageCedar Court — Available Companions
            • article1. Sylvara Thornwatch — Cedar Court Ranger
            • article2. Bristlewick, the Cedar Court Rootspeaker
            • article3. Pipkin Vell, Cedar Court Apothecary
        • sceneS4Leaving The Cedar Court
      • actA4Court of Endless Revelry
      • actA5The Court of Seasons
        • narrativeStub Overview
      • actA6Barak Thuld
        • narrativeBarak Thuld
        • articleRagna Stonewake
        • mapBarak Thuld Sketch
        • mapBarak Thuld
        • mapBarak Thuld - Level 1
        • mapBarak Thuld - Level 2
        • mapBarak Thuld - Level 3
        • imageRagna Stonewake
      • actA7Desolation Blade Mounts
        • narrativeStub Overview
      • actA5The Petitetioner's Port
        • narrativeStub Overview
        • sceneS1Around Petitoner's Court
          • encounterE1Petitioner's Port
            • narrativeMain
          • encounterE2Cyneheard Imports
            • narrativeMain
          • mapPetitioner's Port Act
          • encounterE3Vhinigan's Haberdashery
            • narrativeMain
          • encounterE4Bracken & Bell Forge
            • narrativeMain
          • encounterE5The Sturdy Sword
            • narrativeMain
          • encounterE6Stillwater Remedies
            • narrativeMain
          • encounterE7The Wayfarer's Rest
            • narrativeMain
          • encounterE8The Iron Measure
            • narrativeMain
          • encounterE9Executive Seat
            • narrativeMain
          • encounterE10The Ninefold Athenaeum
            • narrativeMain
          • encounterE11The Measure & Mark
            • narrativeMain
          • encounterE12The Lantern Chapel
            • narrativeMain
          • encounterE13Petronax Villa
            • narrativeMain
        • sceneS2Alabastrine
          • narrativeMain
          • mapAlabastrine Map
        • articlePetitioner's Port Overview
      • actA2The Gilded Cage
        • narrativeStub Overview
      • actA3The Court of Seasons
        • narrativeStub Overview
    • Bucket
      • handoutThe Palakar Forest & The Town of Macridi
      • handoutTest Handout
      • handoutGuild Contract
      • handoutFanciful Inquiries
      • handoutThe Iron Root Apothecary
      • monster blockYoung Reefclaw
      • handoutTrouble Up Profit's Flow
      • monster blockZebub
      • articleDesolation Blade Mounds - min
      • articleTreasure, Crafting Materials, and Reagents
      • letterSubject: Reiver’s Right — Halven Dorr Missing
      • mapThe Lower Works Battlemap
      • mapThe Lower Works Map
    • Reference
      • imageShining Lands 1
      • imageShining Lands 2
      • imageKellid
      • imageDruma
      • imagemacridi-2
      • imagemacridi-1
      • articleArchtype - Prophet of Kalistrade
      • articleArchtype - BlackJack
      • imageDruma, Profit and Prophecy
      • imageBlighted Fey - 1
      • imageBlighted Fey - 2
      • imageForest Blight
      • imageBlight
      • pageThe Macridi Sandbox – How It All Ties Together
      • imageMammon
      • imageMammon Watercolor
      • pageMudjaw Reach backup
      • narrativeNew Macridi 2
      • imageKerse 1
      • imageKerse 2
    • Trash
      • narrativeMain
      • shopTraveling Merchant · The Long Dividend
      • pageMain
    • Inbox
      • mailFree Maps!
      • mailA Note from Iron-Root Apothecary
      • mailReiver’s Right — Halven Dorr Missing
      • mailMaps of New Macridi and Kerse compliments of Darno Karland
      • mailA Piece of Timber I Need Back
      • mailA Small Matter at Reiver's Right
      • mailReiver’s Right Follow-Up: Kerse Preparations Underway
      • mailRegarding the Blackjacket Scout
      • mailPersonal Correspondence
    • PCs
      • pcUlysses
        • narrativeCharacter Sheet
        • pageMain
        • pageStat Block
      • pcBashi Dai
        • narrativeCharacter Sheet
        • pageMain
        • pageStat Block
      • pcSkye Flamebelch
        • narrativeCharacter Sheet
        • pageMain
        • pageStat Block
      • pcDoku
        • narrativeCharacter Sheet
        • pageMain
        • pageStat Block
    • NPCs
      • npcSella Varn
        • narrativeMain
        • narrativeCharacter Sheet
        • pageMain
      • npcCorven Vellicus
        • narrativeCharacter Sheet
        • pageMain
scene

S6 - Reiver's Right

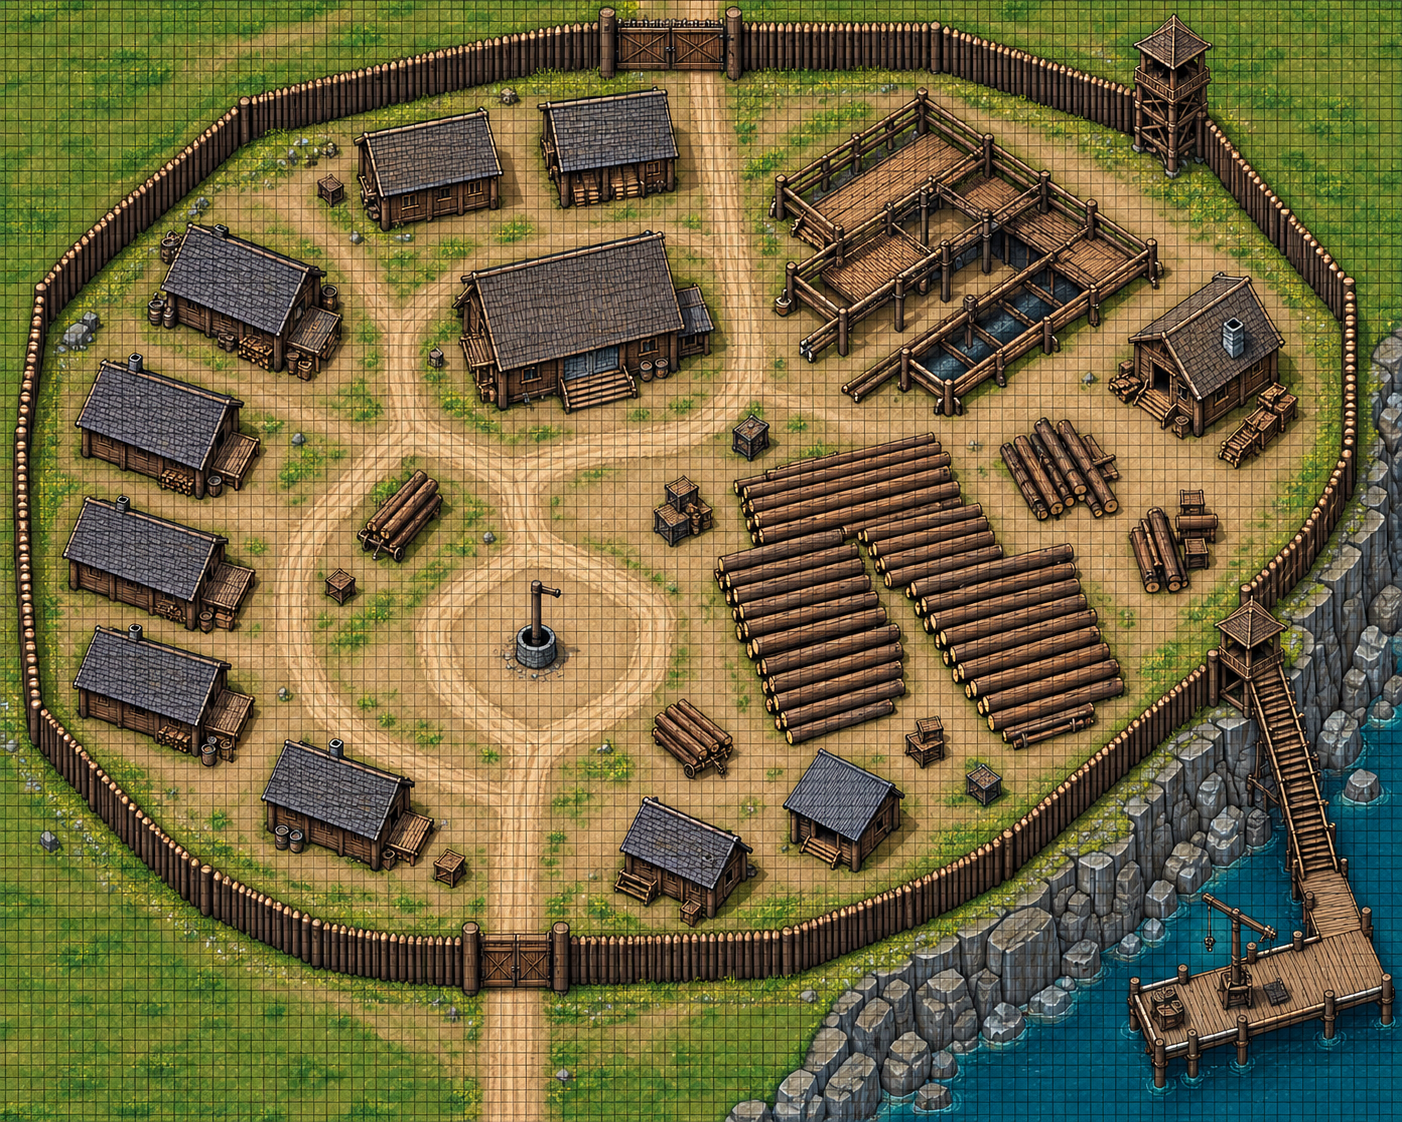
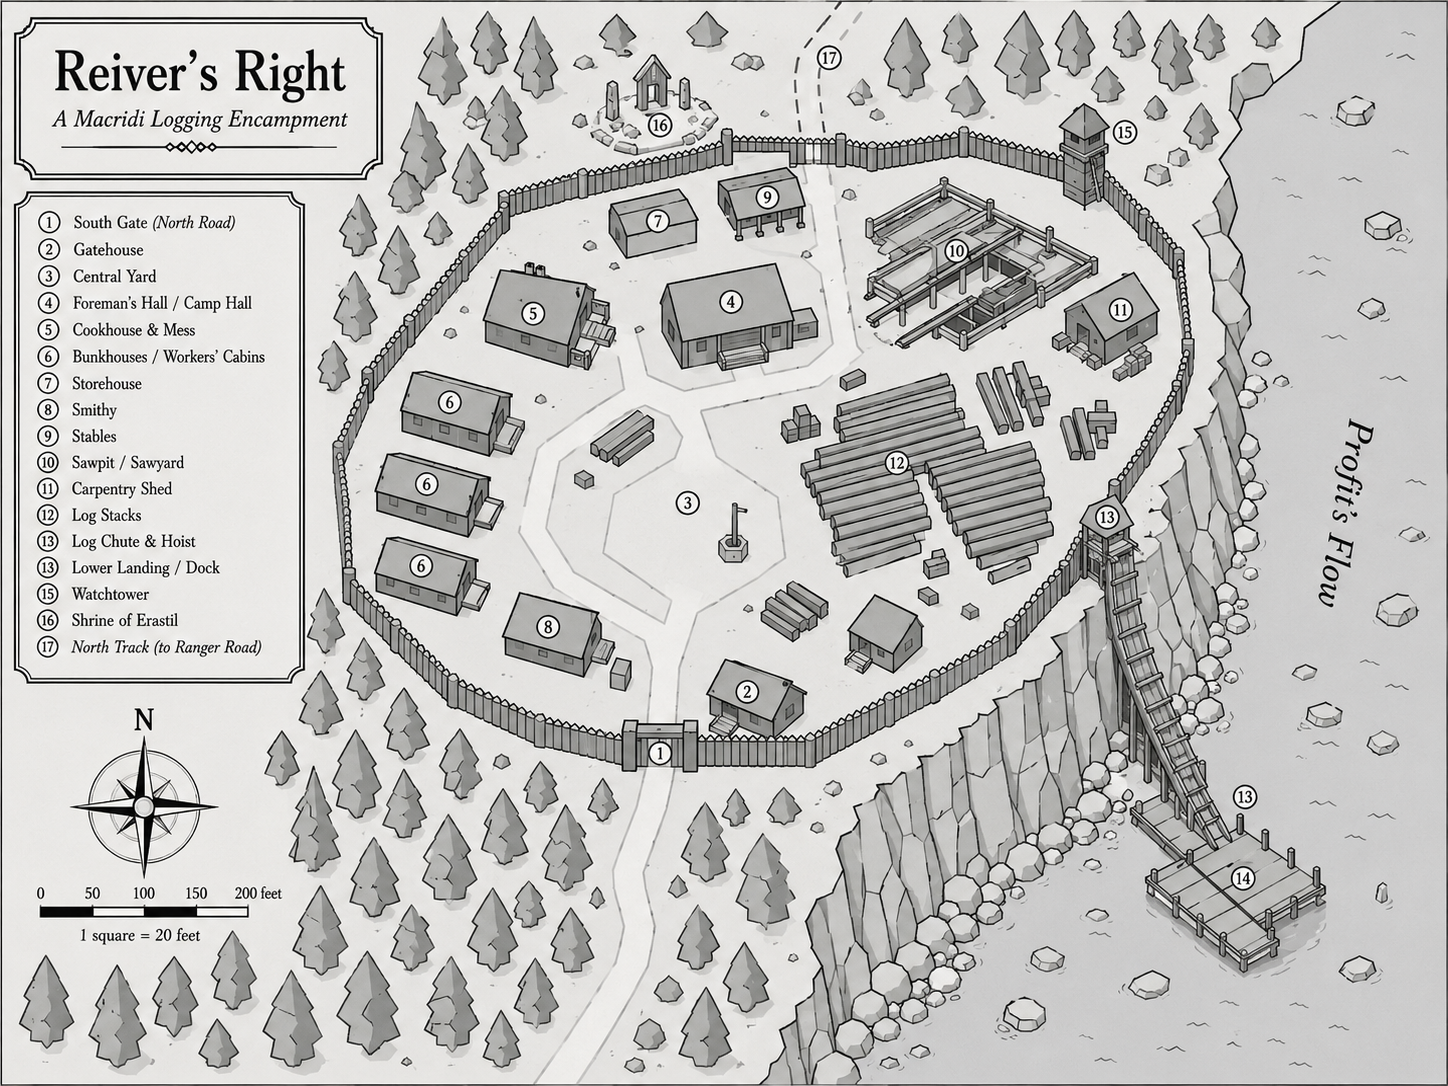
Reiver's Right Sketch
Reivers's Right Battlemap
Reiver's Right Sketch (Unmarked)

Workers Escape

Reiver's Right — GM Lore

The Flight of Fifty

Two Roads into the Palakar Forest

What Happened to the Workers

As the corruption spread through Reiver's Right, fifty surviving workers abandoned the logging camp. They had seen enough of the blight to understand that remaining was dangerous, but they knew little about its origin or how far it had spread.

Rather than flee together, the workers divided into two groups. One headed toward the Cedar Court, while the other sought the Court of Endless Revelry.

Both groups avoided the road toward the Pulgari Estate. Rumors circulating among the workers claimed that the blight was particularly severe at the crossroads on the North Road, near the estate.

Abandoning Reiver's Right

The evacuation was hurried but not entirely disorderly. Workers gathered what food, water, tools, and personal belongings they could carry. They abandoned the heavy logging equipment, unfinished timber, and most of the camp's supplies.

The fifty survivors understood that traveling as one large party through an increasingly hostile forest would be difficult. Dividing gave them two possible destinations and reduced the risk that a single blocked route would trap everyone.

Both parties left Reiver's Right using familiar logging paths and woodland trails rather than attempting to transport the workers and their belongings in wagons along the main road.

Escape Group One

The Cedar Court

The first group headed into the forest toward the Cedar Court, hoping to find protection among its ancient trees and resident fey.

They followed woodland trails, relying on workers familiar with the surrounding forest to keep them away from the North Road.

Their destination offered the possibility of shelter beyond the immediate reach of the corruption, although none of the workers could be certain how the court itself had been affected.

Known: The group departed Reiver's Right intending to reach the Cedar Court.

Escape Group Two

The Court of Endless Revelry

The remaining workers chose the Court of Endless Revelry as their destination.

Their party took a different route through the forest, avoiding the North Road and the approaches to the Pulgari Estate. Like the Cedar Court group, they traveled on foot and carried only what they needed to survive the journey.

The workers hoped that reaching another established fey court would offer them refuge from whatever was consuming the forest around Reiver's Right.

Known: The group departed Reiver's Right intending to reach the Court of Endless Revelry.

Why They Avoided the Pulgari Estate

Before the evacuation, rumors had reached the logging camp that the blight was especially dangerous around the crossroads on the North Road near the Pulgari Estate.

The workers had no reliable way to verify these reports. Nevertheless, the possibility of encountering a more concentrated outbreak was enough to convince both groups to avoid the crossroads entirely.

Neither group attempted to seek refuge at the estate. Instead, they accepted the difficulties of traveling through the forest rather than risk the reported danger on the main road.

Evidence at Reiver's Right

Characters investigating the abandoned camp can find signs of a hurried evacuation: missing travel supplies, personal belongings left behind, and evidence that a substantial number of workers departed on foot.

Notes, conversations recorded in workers' journals, or accounts from any surviving witnesses can reveal that the refugees divided into two parties and identify their intended destinations.

The rumors about the North Road provide an additional clue, drawing attention to the crossroads near the Pulgari Estate without establishing whether the reports were accurate.

What Remains Unknown

The evidence at Reiver's Right establishes that fifty workers fled in two groups. It does not, by itself, establish that either group reached its destination or was granted refuge by the fey.

The party may discover more by following the refugees' routes, visiting either court, or encountering survivors elsewhere in the Palakar Forest.

GM Notes for Party of 5, 2nd Level

Encounter Scaling & Adjustments

Module: The Price of Prophecy — Act 1 (Reiver's Right) | Party: 5 PCs, Level 2

5-Player XP Thresholds

Low: 50 | Mod: 100
Sev: 150 | Ext: 200

Level 2 Target DCs

DC 18 (Standard)
DC 16 (Easy) | DC 20 (Hard)

Creature Values (vs L2)

L-1: 15 | L0: 20
L1: 30 | L2: 40 | L3: 60

E2 — Gatehouse Snapbow

Hazard 1 → 2

Baseline: Hazard Level 1 (Simple) — 6 XP[cite: 1]. Trivial threat for a 2nd-level party[cite: 1].

  • Option A (Level Scale): Upgrade to Hazard 2. Set Stealth/Thievery/Crafting to DC 18, Attack +12, Damage 2d8+4 piercing[cite: 1].
  • Option B (Tactical Combo): Keep Hazard 1 (6 XP) and add 2× Infernal Rootlings (Level 0, 20 XP each) inside the room to trigger a 46 XP (Low Threat) dynamic encounter[cite: 1].

E3 — Central Yard

Target: Moderate (100 XP)

Baseline: 3× Hardwood Scamp (Level 1, 30 XP each) = 90 XP (Low-Moderate for 5× Level 2)[cite: 1].

  • Quantity Scaling: Add 1× Hardwood Scamp (4× total = 120 XP) or add 1× Infernal Rootling (Level 0, 20 XP) to total 110 XP (Moderate)[cite: 1].
  • Elite Scaling: Apply the Elite template to 1× Hardwood Scamp (making it Creature 2, 40 XP) = 100 XP (Moderate)[cite: 1].

E4 — Foreman's Hall (Foreman Hendrick)

Boss Encounter

Baseline: 1× Foreman Hendrick (Creature 2 = 40 XP)[cite: 1]. Solo Creature 2 against five Level 2 PCs is Trivial[cite: 1].

  • Option A (Solo Capstone — Moderate/Severe): Apply Elite template to Hendrick (Creature 3 = 60 XP) and add 2× Infernal Rootlings (Level 0, 20 XP each) = 100 XP (Moderate)[cite: 1].
  • Option B (Story Minions): Keep Hendrick at Creature 2 (40 XP) and add 2× Infernal Thornlings (Creature 1, 30 XP each) breaking through the floorboards = 100 XP (Moderate)[cite: 1].

E7 — Rigged Cargo Collapse

Hazard Scale

Baseline: Simple Hazard 1 (6 XP)[cite: 1].

  • Increase Stealth, Thievery, and Crafting checks to DC 18[cite: 1].
  • Increase Reflex Save to DC 19 and damage to 2d8+4 bludgeoning[cite: 1].

E10 — Sawpit / Sawyard

Target: Moderate (100 XP)

Baseline: 1× Infernal Rootling (20 XP) + 1× Infernal Thornling (30 XP) = 50 XP (Low)[cite: 1].

  • Adjustment: Increase squad size to 2× Infernal Thornlings (30 XP each) + 2× Infernal Rootlings (20 XP each) = 100 XP (Moderate)[cite: 1].

E12 — Log Stacks

Target: Severe (150 XP)

Baseline: Wood Wraith (Creature 2, 40 XP) + 3× Animated Log Servants (Creature -1, 15 XP each) = 85 XP[cite: 1].

  • Severe Capstone Adjustment: Apply Elite to Wood Wraith (Creature 3 = 60 XP), increase to 5× Animated Log Servants (75 XP total), and add 1× Infernal Rootling (20 XP) = 155 XP (Severe)[cite: 1].

Immediate Execution Steps

  • Update stat block payloads in module-export.schema.json with Elite adjustments for Foreman Hendrick and Wood Wraith[cite: 1].
  • Update placement arrays and quantity values in E3, E10, and E12 encounter nodes[cite: 1].
  • Bump skill and saving throw DCs for Gatehouse Snapbow and Rigged Cargo Collapse hazards by +2[cite: 1].

Five Relics of Reiver's Right

GM Reference · Reiver's Right

Five Relics of Reiver's Right

Personalized Level 2 Rewards · Five-Character Party

Treasure Distribution

Five unusual magical items have been placed throughout Reiver's Right. Three are found in the surface complex, while two are located in the Lower Works.

These items are intended as permanent magical rewards. Count their assigned values toward the party's normal treasure allotment.

Identification: The suggested DC for each level 2 item is 16. Identifying magic normally requires 10 minutes and a trained applicable skill. Checks are rolled secretly by the GM.

L4 — Foreman's Hall

Item: Lantern of Last Echoes
Intended recipient: Necromancer
Identification: Occultism DC 16

A small blackened iron lantern rests inside a locked cabinet among Foreman Hendrick's personal effects. Its glass is smoky and its wick remains cold, yet pale blue light occasionally moves behind the glass.

Discovery: The cabinet can be opened normally if Hendrick's keys are recovered, or by appropriate lock-opening methods. No additional hidden-object check is necessary.

Story connection: The lantern belonged to a missing worker investigating nighttime activity. Its first activation reveals a fleeting image of workers hauling a covered load toward the Lower Works.

L8 — Smithy

Item: Thuld's Pattern Awl
Intended recipient: Runesmith
Identification: Arcana DC 16

An old dwarven tool chest stands beneath the smithy's workbench. Among ordinary chisels and punches lies an unusually balanced engraving awl, its brass handle decorated with geometric dwarven knotwork.

Discovery: Anyone examining the tool chest finds the awl. A character familiar with runecrafting recognizes its exceptional workmanship without needing to Identify Magic.

Story connection: The awl bears the maker's mark of Barak Thuld. Its magical properties can expose altered or deliberately concealed inscriptions in the Lower Works.

L11 — Carpentry Shed

Item: Brassbound Hero's Mark
Intended recipient: Exemplar
Identification: Religion DC 16

A battered leather protective harness hangs from a peg beside a collapsed workbench. Fixed to the harness is a palm-sized brass insignia depicting a shield raised above a fallen companion.

Discovery: The insignia is visible during ordinary exploration of the shed. Its brass surface remains inexplicably warm despite the cold surroundings.

Story connection: The insignia belonged to a worker who helped others escape during the evacuation. It responds to courageous acts of protection and carries an old dwarven blessing.

E18 — Lower Works, Alchemical Station

Item: Amberglass Reagent Case
Intended recipient: Alchemist
Identification: Crafting DC 16 (Identify Alchemy)

A compact case of darkwood and reinforced brass sits among experimental apparatus and abandoned Golden Hand research notes. Inside are precision measuring instruments, amber-lined vials, and fitted compartments for volatile reagents.

Discovery: The case is readily visible while searching the station. Its specialized purpose is obvious to anyone trained in alchemical work.

Story connection: Residue within several vials provides supporting evidence of experiments involving Infernal Seedlings. The case may be useful during Morwenna Iron-Root's neutralizer research.

E18 — Lower Works, Root Chamber

Item: Cedar Whisper Charm
Intended recipient: Animist
Identification: Nature DC 16

A small pendant containing golden cedar resin hangs from a length of green cord. It is caught among blackened roots growing through the chamber wall. Unlike the surrounding vegetation, the cord and resin show no signs of corruption.

Discovery: The pendant becomes apparent when the party investigates the roots or clears the chamber. It can be removed without damaging the amber.

Story connection: The charm contains a faint echo of the Cedar Court's living magic. When first handled, it produces a momentary sensation of wind moving through healthy cedar branches.

GM Checklist

Running the Rewards

Do not require secret Perception checks simply to discover these items. Ordinary exploration of their locations should reveal them.

Players can recognize obvious physical functions without identifying the magic. Successful identification reveals the item's special abilities and activation requirements.

The intended recipients are suggestions, not restrictions. Any character may claim an item they can legally use.

GM reminder: These are custom homebrew items. Their final item levels, traits, activation requirements, and prices should be established before including them in the permanent treasure budget.

The Long Dividend

River Commerce · Old Macridi

The Long Dividend

Captain Sella Varn's Timber Barge

The Long Dividend is a familiar sight along Profit's Flow, where it serves as a working timber barge under the command of Captain Sella Varn. Its principal business is guiding large collections of floating logs from the lumber operations of the Palakar Forest toward the mills, lumberyards, and commercial docks farther downriver.

Although the vessel can carry finished lumber, supplies, and smaller shipments of general freight, most of the timber it transports never comes aboard. Instead, logs are floated directly in the river, gathered into long rafts and controlled by the barge and its crew.

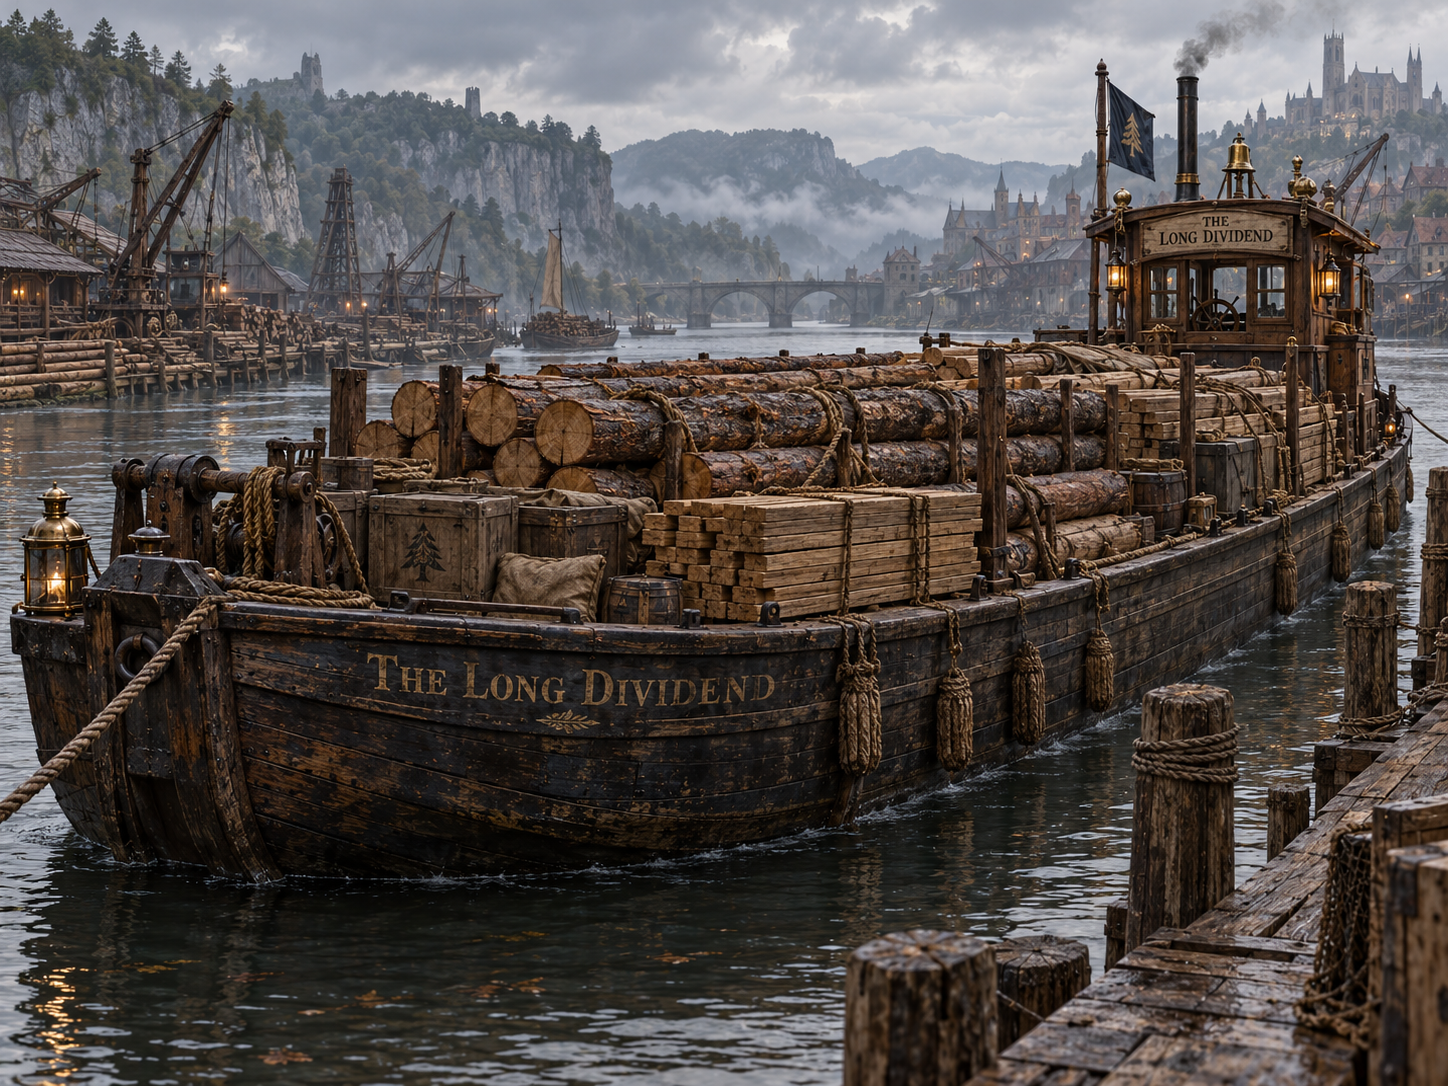
The Long Dividend is a broad, shallow-drafted wooden barge with a weathered dark hull, stout railings, and a modest deckhouse at the stern. Its name is painted along the side in faded gold lettering, and thick coils of rope hang from sturdy iron fittings along the deck.

A few stacks of cut lumber, barrels, and working equipment occupy the cargo deck, but the vessel's most impressive burden lies in the water around it. Great lengths of freshly cut timber float alongside and behind the barge, gathered into broad rafts secured by heavy ropes and chains.

Crew members move along the deck with long wooden poles and boat hooks, adjusting the position of the floating logs as the vessel makes its way along the river.

A Working Timber Barge

The Long Dividend was built specifically for the demands of the Druman timber trade. Its broad, shallow hull allows it to navigate relatively shallow stretches of Profit's Flow, while its heavy construction and numerous attachment points make it well suited for controlling large rafts of floating timber.

Rather than loading every log onto the vessel, the crew gathers cut timber into floating groups secured with ropes, chains, and wooden crosspieces. The barge helps guide these collections through bends, narrow channels, and busy stretches of river, preventing the logs from scattering or becoming stranded along the banks.

Smaller boats and experienced river workers assist with positioning the rafts, particularly when navigating difficult stretches. During busy shipments, the timber trailing the Long Dividend can extend for a considerable distance downriver.

The barge also carries tools, spare ropes, replacement fittings, food, and other supplies needed during long river journeys. Finished planks and beams are occasionally transported directly on deck when circumstances require it.

Captain Sella Varn

Captain Sella Varn is an experienced river captain who has spent much of her working life navigating Profit's Flow. She is familiar with its changing currents, shifting sandbars, seasonal water levels, and the many docks and landings serving the timber industry.

Varn is practical, direct, and attentive to the safety of her vessel and crew. She maintains a disciplined operation, particularly when handling large timber rafts that require careful coordination.

When in Old Macridi, she is frequently found at the Gilded Ledger Tavern, where she meets with lumber merchants, mill operators, and other river captains to arrange shipments and discuss conditions along the waterway.

The Crew

The Long Dividend carries a small but experienced crew of boatmen, timber handlers, and river workers. Their responsibilities include managing the vessel, maintaining its equipment, securing timber rafts, and guiding floating logs through difficult sections of the river.

Timber handling requires strength, balance, and considerable experience. Crew members frequently work with long poles, boat hooks, ropes, and winches to keep the timber moving safely and prevent dangerous logjams.

During major shipments, additional workers may accompany the barge in smaller boats to help control the floating timber.

Life Aboard

Life aboard the Long Dividend follows the routines of a working river vessel. The crew rises early, checks the timber rafts and securing lines, and prepares for the day's travel before the river becomes crowded with other commercial traffic.

The deckhouse provides modest accommodations and a sheltered place for meals and rest. Most of the open deck is reserved for working equipment, provisions, and whatever cargo the barge happens to be carrying.

Meals are simple, workdays can be long, and the crew is accustomed to spending several days at a time on the river between established landings.

Freight and Passenger Passage

Although timber transport is its primary purpose, the Long Dividend occasionally carries smaller commercial shipments between settlements along Profit's Flow. Tools, foodstuffs, building supplies, and personal goods may be accepted when sufficient deck space is available.

Captain Varn also accepts a limited number of passengers when her schedule and working conditions permit. Accommodations are basic, and travelers must remain clear of the crew and timber-handling equipment.

Because the barge travels at the pace required to manage its floating timber, journeys are generally slower than those made by dedicated passenger vessels. Nevertheless, passage aboard a working barge can be an economical and dependable way to travel between river settlements.

The Macridi Timber Trade

Timber has long been one of the important commercial products moving through Macridi. The forests of the Palakar region provide lumber used in construction, furniture making, shipbuilding, and numerous other trades.

Profit's Flow offers a practical means of transporting large quantities of cut logs without the expense of moving them overland. Barges like the Long Dividend help keep timber shipments organized and moving safely toward downstream markets.

With the gradual recovery of the region's lumber operations, river traffic continues to provide work for boatmen, timber handlers, dockworkers, merchants, and the many businesses dependent upon the trade.

Visiting the Long Dividend

When docked at Old Macridi, the Long Dividend is usually occupied with unloading supplies, preparing timber shipments, inspecting equipment, or taking on provisions for its next journey.

Visitors seeking Captain Varn can inquire aboard the vessel or leave word at the Gilded Ledger Tavern. Freight arrangements and passenger passage are generally negotiated directly with the captain.

A small traveling merchant, Perrin "Odds" Tallow, also maintains a stall aboard the barge when it is docked. His selection of general supplies, tools, and everyday merchandise is popular with river workers and travelers preparing for journeys beyond Macridi.
The Long Dividend Image
General Equipment · The Long Dividend

Tallow's Odds & Ends — Shop Menu

Adventuring Gear, River Supplies, Tools & Traveling Necessities

Perrin "Odds" Tallow keeps a well-stocked collection of practical goods aboard the Long Dividend. His selection changes between voyages, but the following merchandise is currently available for purchase.

All prices are listed in gold pieces (gp), silver pieces (sp), or copper pieces (cp). Stock represents the number of units or bundles currently available.

Adventuring Essentials

ItemPriceStockDetails
Adventurer's Pack1 gp, 5 sp5Complete pack
Backpack1 sp6Standard
Bedroll2 cp8Standard
Flint and Steel5 cp8Standard
Waterskin5 cp10Standard
Rations4 sp121 week
Rope5 sp850 feet
Soap2 cp12Standard
Chalk1 cp2010 pieces
Candle1 cp1510 candles
Torch1 cp30Each
Oil1 cp20Lamp oil, 1 pint
Signal Whistle8 cp6Standard

Lighting and Exploration

ItemPriceStockDetails
Lantern1 gp2Bull's-eye
Lantern7 sp4Hooded
Climbing Kit5 sp3Standard
Grappling Hook1 sp5Standard
Crowbar5 sp4Standard
Hammer1 sp5Standard
Piton1 cp1210 pieces
Ten-Foot Pole1 cp6Standard
Compass1 gp3Standard
Mirror1 gp3Standard
Hourglass3 gp2Standard
Spyglass20 gp1Standard
Magnifying Glass40 gp1Standard
Ladder (10 ft.)3 cp2Wooden

Containers and Storage

ItemPriceStockDetails
Sack1 cp205 sacks
Chest6 sp4Wooden
Lock2 sp4Poor quality
Lock2 gp2Simple quality
Chain4 gp210 feet
Saddlebags2 sp3Standard
Mug1 cp10Standard

Camping and Cooking

ItemPriceStockDetails
Tent8 sp4Pup tent
Tent5 gp2Four-person tent
Cookware1 gp4Standard
Fishing Tackle8 sp5Standard
Net1 gp3Standard

Clothing and Personal Goods

ItemPriceStockDetails
Clothing1 sp6Ordinary
Clothing4 sp4Winter
Clothing2 gp2Fine
Writing Set1 gp5Standard
Writing Set1 sp10Extra ink and paper
Scholarly Journal6 gp1General reference

Tools and Trade Supplies

ItemPriceStockDetails
Repair Toolkit2 gp3Standard
Artisan's Toolkit4 gp2Standard
Alchemist's Toolkit3 gp1Standard
Healer's Toolkit5 gp2Standard
Thieves' Toolkit3 gp1Standard
Merchant's Scale2 sp3Standard
Basic Crafter's Book1 sp3Standard
Formula Book (Blank)1 gp3Blank

Additional Adventuring Supplies

ItemPriceStockDetails
Caltrops3 sp6One set
Manacles3 gp2Simple
Disguise Kit2 gp2Standard
Religious Symbol1 sp4Wooden
Religious Symbol2 gp2Silver
Spellbook (Blank)1 gp2Blank
Survey Map1 gp3Regional

Purchasing and Availability

All listed items are ordinary equipment, available while supplies last. Tallow generally sells at standard market prices and may negotiate a modest discount for large purchases.

He purchases serviceable secondhand equipment at approximately half its normal market value, subject to condition and demand.

Items not currently in stock may be ordered for delivery during a future voyage of the Long Dividend. Availability depends on river traffic and the markets visited along Profit's Flow.

Traveling Merchant · The Long Dividend

Traveling Merchant · The Long Dividend

Tallow's Odds & Ends

Traveling Sundries, Adventuring Supplies & Practical Goods

Beneath a patched green awning near the stern of the Long Dividend, folding tables and wooden shelves display an impressive assortment of traveling goods. Lanterns hang beside coils of rope, camping equipment, tools, cooking utensils, and bundles of useful supplies.

A wiry, middle-aged halfling with an unruly gray mustache sits behind the counter, balancing a battered ledger across his knees.

"Looking for something particular? Wonderful! I've probably got three things that'll do the job, and two more you'll realize you needed tomorrow."

Perrin "Odds" Tallow

Perrin Tallow is a traveling merchant who rents a small section of deck space aboard Captain Sella Varn's timber barge, the Long Dividend. He purchases merchandise at river markets and sells it at settlements and landings along Profit's Flow.

Tallow specializes in practical goods useful to travelers, sailors, lumber workers, craftsmen, and adventurers. His stock changes between voyages, but ordinary adventuring equipment is almost always available.

He is cheerful, talkative, and fond of bargaining, particularly with customers purchasing several items at once. He takes pride in finding something useful for almost any situation, even when it isn't precisely what the customer originally requested.

Goods and Services

Tallow's merchandise includes everyday traveling necessities, camping equipment, lanterns, rope, tools, containers, clothing, writing materials, and general adventuring supplies.

His selection is particularly useful to people preparing for journeys along Profit's Flow or into the surrounding forests. River workers frequently visit his stall to replace worn equipment or purchase supplies before setting out.

Although he occasionally acquires specialized equipment, Tallow primarily deals in ordinary, practical merchandise rather than magical goods or expensive weapons and armor.

Buying and Bartering

Tallow purchases ordinary equipment, tools, clothing, containers, and other serviceable merchandise. He generally offers half the listed market price for goods in good condition, subject to demand and available cargo space.

He is particularly interested in practical equipment that can be resold to sailors, timber workers, and travelers along Profit's Flow.

Tallow is willing to barter, especially when customers have useful goods in good condition. He occasionally offers a modest discount for larger purchases or repeat customers.

Special Orders

Customers looking for ordinary goods that are not currently available may leave a request with Tallow. He will attempt to obtain the merchandise during a subsequent trading stop.

Delivery depends on the Long Dividend's sailing schedule, the availability of goods at other river markets, and the space available aboard the vessel.

Tallow makes no promises about exact delivery dates, though he is generally reliable about following up on requests.

Availability

Tallow's shop is open whenever the Long Dividend is docked and cargo operations permit.

His stall may close temporarily while timber rafts are being assembled, cargo is loaded or unloaded, or the crew prepares the barge for departure.

Because the Long Dividend regularly travels between river settlements, Tallow is not always present in Old Macridi. His inventory changes from voyage to voyage.

"A good rope, a dry bedroll, and a working lantern," Tallow says, tapping the counter. "Those are the things people remember needing after they've already left town. Best buy them while you can."

Read-only syndicated snapshot · Syndicated Oct 28, 2026, 6:09 PM. Content updates when the author syndicates again in Adventure Maker.

Made with Amba. Want to try it? Check out Amba — free to use.