E13 — Log Chute & Hoist
Background art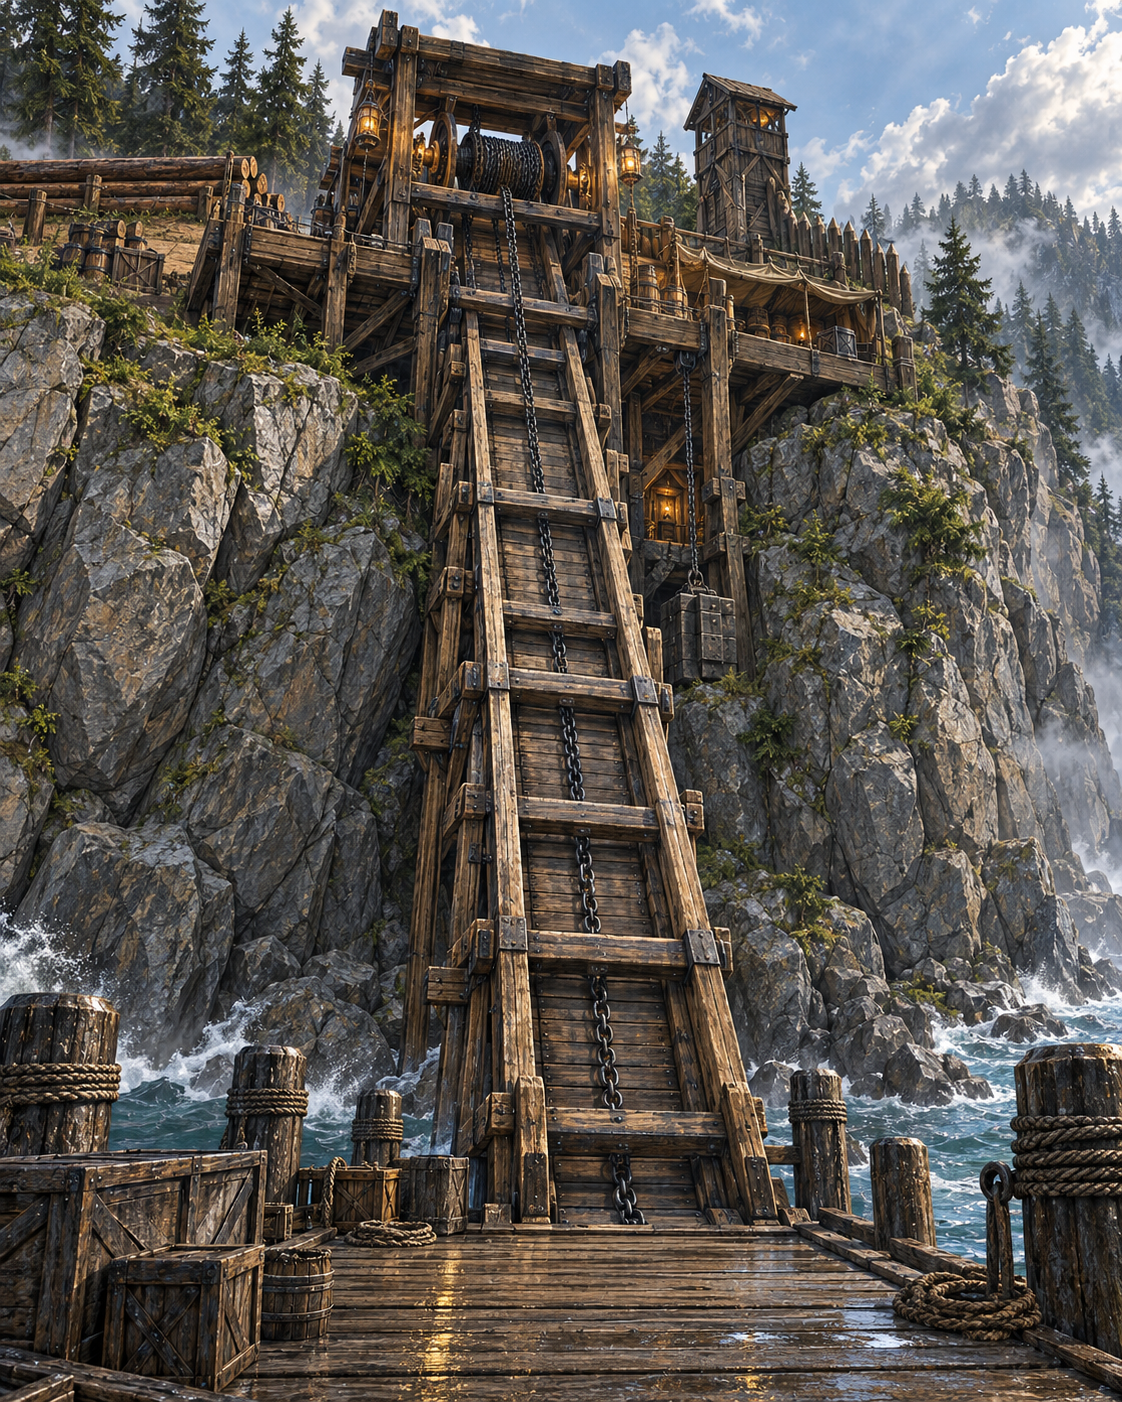
Log Chute & Hoist
The Machinery That Gives the Secret Away
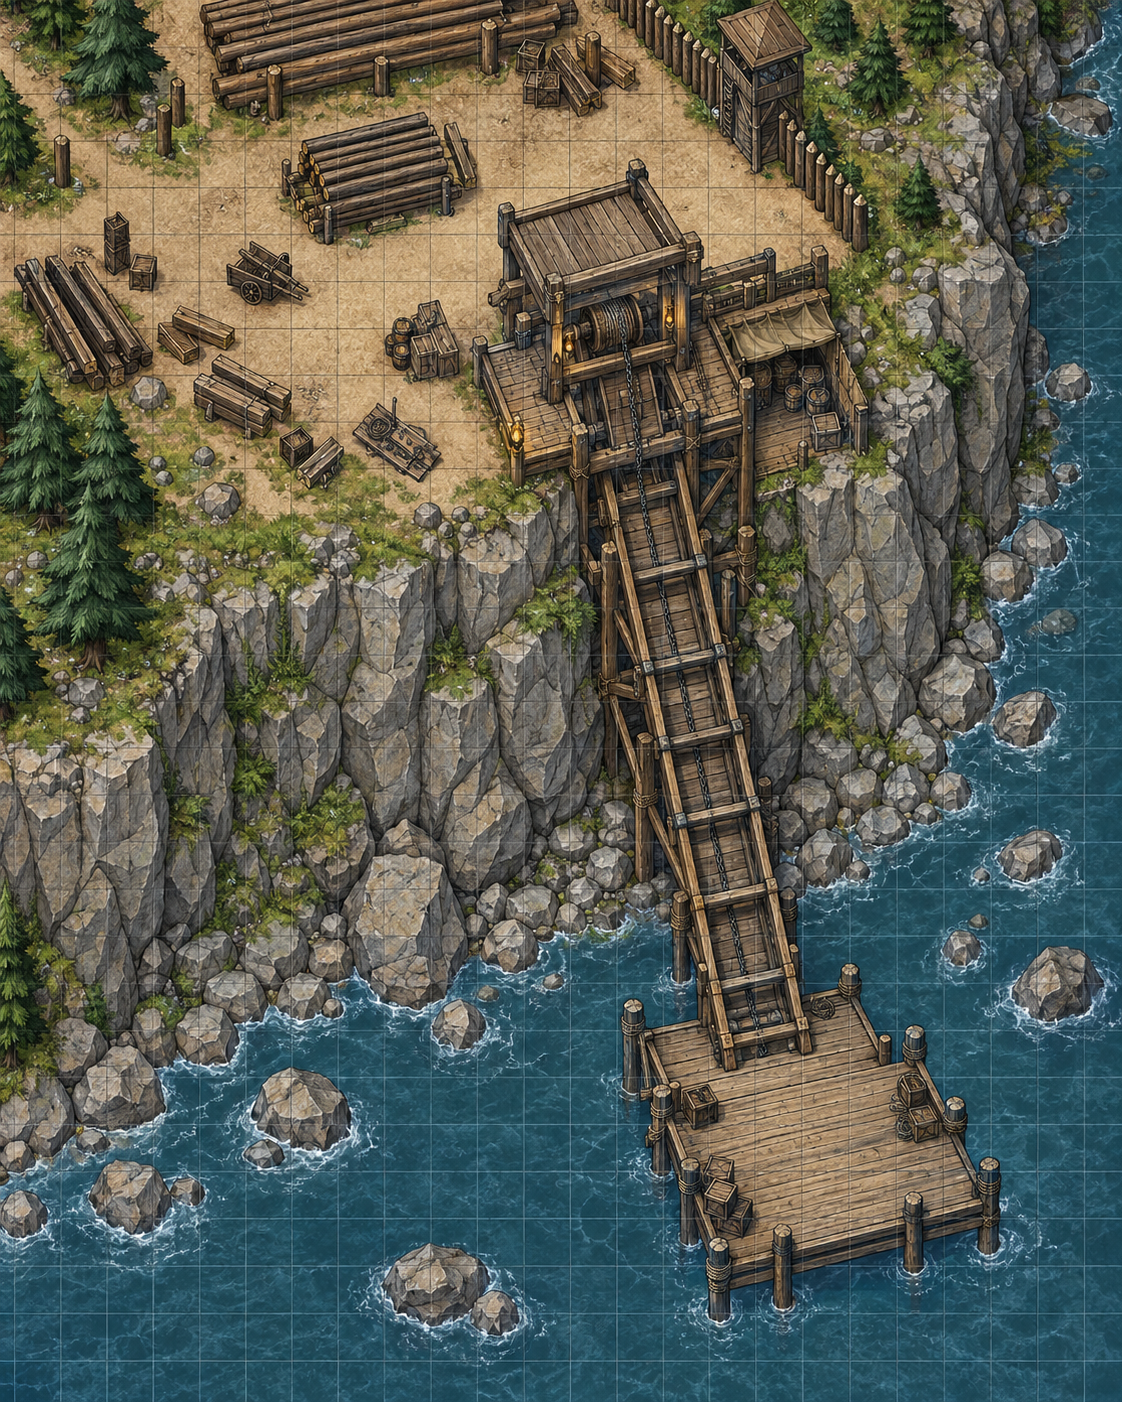
The bluff falls sharply toward Profit's Flow, where a broad timber landing clings to the rocks below. Between the yard and the river, a heavy log chute descends through a framework of braces, platforms, and weather-darkened supports.
At the top stands the largest piece of machinery in Reiver's Right: a massive timber hoist built around an iron-shod brake drum. Heavy chain disappears down the bluff beside the chute, passing through oversized pulleys and counterweights before vanishing toward the lower landing.
It looks like equipment built to move logs downhill.
It is built far too heavily for that.
The Log Chute & Hoist is where the physical evidence surrounding the Lower Works becomes difficult to explain away. Reiver's Right genuinely used the chute to move timber toward the river, but the hoist has also been performing a second job: repeatedly hauling extremely heavy loads up from somewhere below the bluff.
No check is required to understand the obvious purpose of the structure. Logs were rolled or guided down the chute toward the Lower Landing, where they could be loaded onto river barges.
The unusual feature is the hoist. Its drum, chains, brake mechanism, reinforced supports, and counterweights are far more substantial than necessary merely to control descending timber.
Characters who have already identified the Storehouse's heavy hauling equipment, the Smithy's strained chain fittings, or the draft harness in the Stables should immediately recognize another piece of the same system.
Challenge 1: Investigate the Hoist
The wear on the machinery reveals that its most demanding work was not lowering logs toward the river.
The gray clay embedded in the machinery matches residue that can be found on workers' boots in the Bunkhouses, damaged tools in the Smithy, and other equipment associated with the Lower Works.
Characters who have already identified the material recognize the match automatically. No additional check is required.
By this point, the clues should begin converging physically: workers, stoneworking tools, carts, chains, and now the hoist itself have all been moving through the same subterranean environment.
Challenge 2: Follow the Secondary Chain
Most of the main chain descends openly beside the log chute, but careful examination of the hoist platform reveals that part of the mechanism disappears behind timber sheathing built against the bluff.
Behind the timber facing, the bluff does not continue as solid rock.
The outer end of an old hauling passage has been cut directly into it. Heavy beams brace the ceiling, and the concealed chain disappears through iron guides beside a pair of worn hauling tracks. Lamp brackets line the wall. A shallow drainage channel runs along one side beneath lengths of narrow pipe.
Gray clay cakes the floor around abandoned picks, stone wedges, and broken pieces of cribbing.
Beyond the outer staging space, the rails and secondary chain disappear beneath a solid mass of fallen stone, splintered beams, and compacted clay. The tunnel between the log chute and the Lower Works is completely collapsed. There is no gap to crawl through and no working hoist release that opens a way past it.
Once the concealed passage is opened, no check is required to determine that the party has found evidence of a substantial underground excavation.
Shoring timber, hauling tracks, drainage channels, ventilation fittings, lamp brackets, stoneworking tools, and the secondary hoist line all match the evidence uncovered throughout Reiver's Right.
If the players already concluded that the camp concealed prohibited underground work, do not make them roll to prove themselves right. This is the payoff for their deduction.
Challenge 3: Understand the Side Cuts
Within the accessible outer staging space, before the collapsed section, several shallow cuts branch away from the former hauling passage. They do not follow useful stone, natural caverns, drainage routes, or any obvious structural need.
Each terminates in packed earth where mature roots have been deliberately exposed, cut around, and then partially covered again.
The root cuts should be suggestive without immediately explaining the entire Infernal Blight. Characters who have already seen the corrupted roots beneath the Sawpit or Stables can recognize an important pattern: the hidden excavation repeatedly intersects the same living root network through which the black-sap corruption is spreading.
If the party has learned how the blight propagates, the carefully backfilled root pockets become much more ominous. Otherwise, preserve the mystery. The evidence establishes deliberate interference with the root system; it does not automatically reveal what was placed there or why.
The secondary hoist line ends beneath the collapse and cannot be operated through it. Surviving tracks on the outer side show the tunnel's former two-way traffic: timber braces, lamp oil, tools, and other supplies went down, while carts of broken stone and excavated material were hauled up.
This explains several earlier clues at once. The Carpentry Shed produced underground supports, the Storehouse supplied specialized equipment, the Smithy repaired tools worn against stone, the Stables provided draft power, and the hoist moved the resulting material between the Lower Works and the surface.
The passage itself should not be covered in Golden Hand symbols. The operation was meant to remain concealed behind ordinary commercial work.
Characters who have recovered Hendrick's hidden records or identified the hand-and-serpent marks on supply shipments already have the organizational connection. Here, the important discovery is physical: the conspiracy had a real underground work site, and Hendrick's surface operation was built to supply it.
If the players deduced the existence of the excavation before directly opening the concealed access, award the established 10 XP minor accomplishment.
The important discovery is not merely that Reiver's Right contains tunnels. The party has now proven that someone deliberately concealed a substantial excavation beneath the river bluff in a place where the older agreements specifically prohibited deep digging.
Location 13 is where the investigation stops being circumstantial. The suspicious supplies, night crews, damaged tools, shoring timber, draft harness, gray clay, and Hendrick's records all converge here.
The party should leave this location knowing that the Lower Works are real, the logging operation was supporting them, material was being excavated from inside the bluff, and someone deliberately cut into the living root layer while doing so.
What remains unanswered is more important: how extensive the Lower Works are, what the Golden Hand was trying to reach, and what connection that excavation has to the Infernal Blight now spreading through Reiver's Right.
The Lower Works — Western Approach
The Collapsed Access Tunnel
A Way In, If the Party Had the Tools
Behind the abandoned excavation equipment, the bluff has been cut away more deeply than it first appears. Broken timbers, loose stone, and compacted gray clay fill a broad depression in the rock.
At first it looks like nothing more than another failed cut. Then the shape resolves: squared walls, the remains of a timbered ceiling, and a pair of iron hauling rails disappearing beneath tons of collapsed stone.
There was a tunnel here.
This is a former western access into the Lower Works. Before the collapse, the passage connected into the newer excavation network near E18-9 — Eastern Tunnels. The collapse has completely sealed the route.
The party may initially hope this gives them a direct way into the Lower Works from the western side of the bluff, eventually allowing access toward E18-10 — The Deepest Dig. It does not. The blockage is far beyond what adventurers can safely clear with ordinary weapons, rope, crowbars, or hand tools.
Challenge: Find the Buried Passage
The remains of the tunnel are not especially well hidden, but loose stone and the abandoned excavation works make the opening easy to mistake for an ordinary collapsed work face.
The buried rails and surviving alignment show that the passage runs into the bluff toward the active Lower Works. If compared against survey information, excavation notes, or the eventual underground map, the route would have joined the network near E18-9 — Eastern Tunnels.
This explains why E18-9 contains relatively recent excavation despite lying deep within the complex: this western access once provided another route for workers, supplies, carts, and spoil.
Challenge: Assess the Collapse
A quick inspection is enough to determine that simply digging at the rubble would be dangerous. The original support frames have failed, and much of the weight of the surrounding bluff now rests against the collapsed passage.
The collapsed passage is a logistical barrier, not a high-DC Athletics challenge. Repeated checks, picks, crowbars, spells that move a few stones, or simply spending more time do not make the route safely passable.
Reopening it requires the same sort of equipment already seen elsewhere at Reiver's Right: heavy excavation tools, lifting tackle, structural timbers, cribbing, braces, wedges, and mine-shaft shoring equipment.
Without those resources, attempting to enter the Lower Works from this western approach is a dead end.
The discovery still rewards exploration. The party learns that the Lower Works once had more than one access route and that the network extends much farther through the bluff than the visible surface works suggest.
More importantly, it prevents this entrance from bypassing the intended route. To reach E18-9, E18-10, and the deeper excavation during the current investigation, the party must locate a surviving entrance into the Lower Works rather than simply digging through the western collapse.
If the party later returns with proper excavation equipment and enough labor, this passage can be reopened. Doing so would create a new western access route connecting directly into the Lower Works near E18-9 — Eastern Tunnels.
That is a substantial engineering project rather than an exploration action and should take hours or days, depending on the equipment and assistance available.
The Cave Behind the Log Chute
An Abandoned Storage and Maintenance Cave
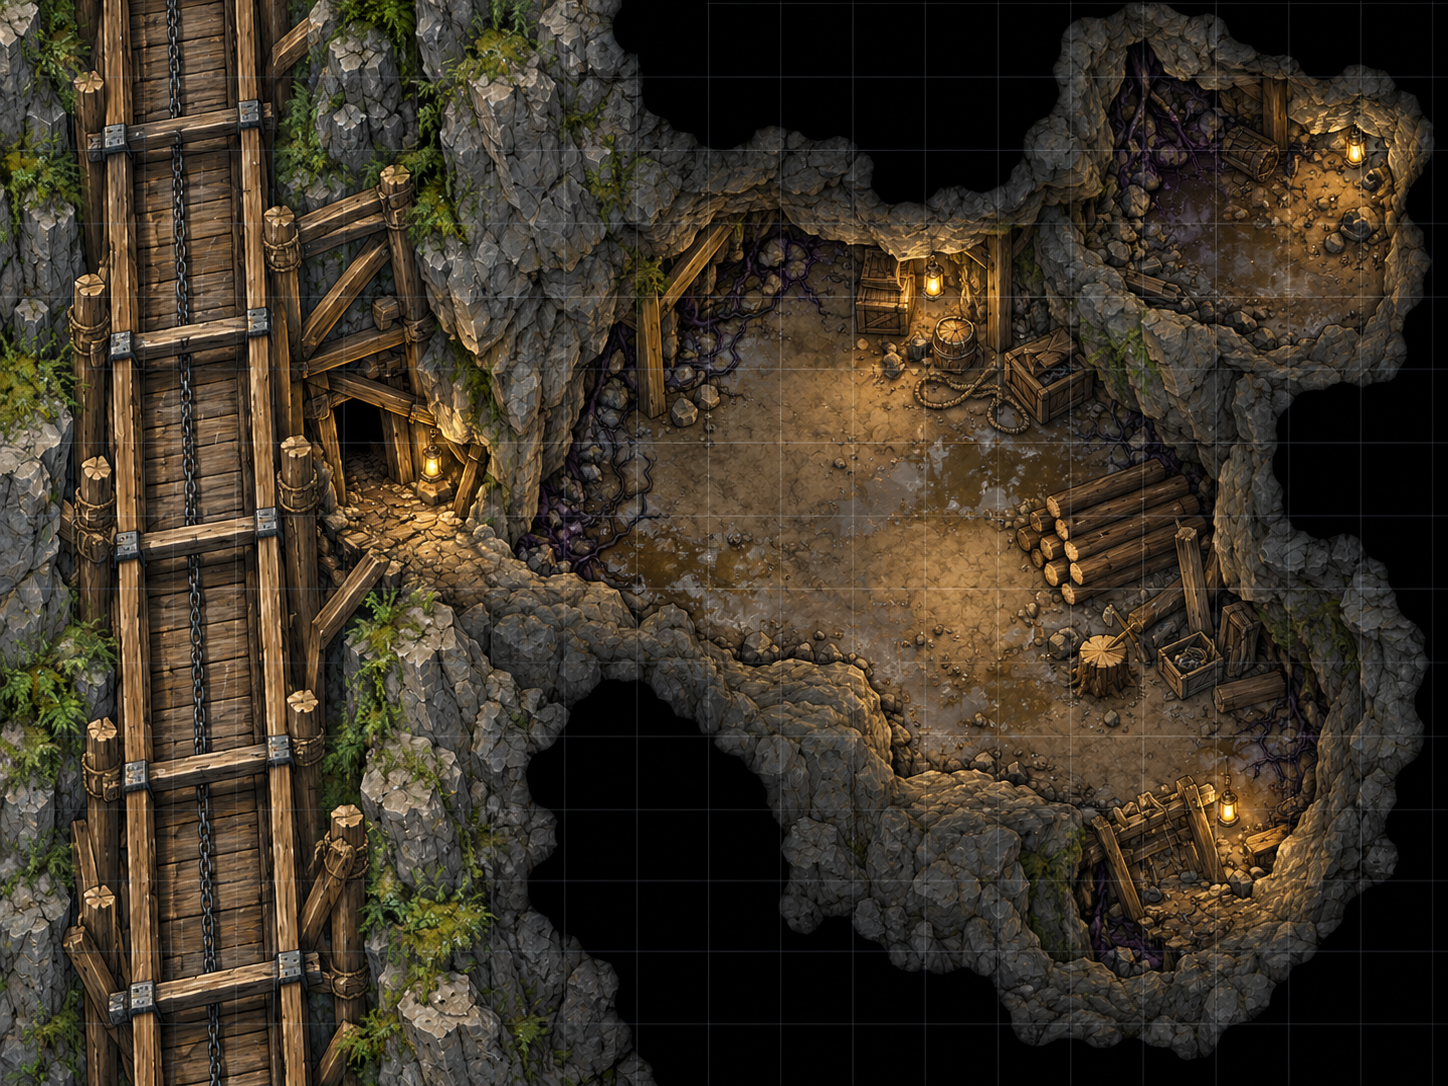
Behind the massive wooden framework of the log chute, an opening leads into a cavern carved into the rocky bluff. Rough-hewn timber supports reinforce the entrance, and old lanterns hang from iron hooks driven into the stone.
The cave opens into a broad central chamber littered with crates, stacked lumber, coils of rope, and abandoned equipment. A damaged handcart rests against one wall. Smaller passages lead into recesses deeper in the rock, where additional supplies have been stored.
Water drips from the uneven ceiling, collecting in shallow puddles across the packed earth. Dark roots creep between the stones and beneath the wooden supports. There is no sign of anyone working here now.
The cave once served as a maintenance and storage area for the log chute. More recently, workers also used it to store excavation equipment and supplies destined for the Lower Works.
There are no creatures or combat encounters here. The party can explore freely, examining the abandoned equipment, searching the smaller chambers, and recovering useful supplies.
The hauling records, survey sketches, and unusual excavation materials provide additional evidence of underground activity. Details for each area, including skill checks and treasure, are provided in the accompanying cave investigation narrative.
The cave does not connect to the surviving Lower Works. The party must continue exploring the camp to locate a usable entrance.
The Cave Behind the Log Chute
What the Workers Left Behind
Behind the enormous wooden framework of the log chute, an opening leads into a cavern cut into the rocky bluff. Heavy timber supports reinforce the entrance, and several old lanterns hang from iron hooks driven into the stone.
The passage opens into a broad chamber filled with stacked lumber, wooden crates, coils of rope, and abandoned equipment. A damaged handcart rests against one wall, its wheels half buried in dirt. Smaller passages branch into the surrounding rock, where additional supplies have been stored.
Water drips steadily from the uneven ceiling, collecting in shallow puddles. Dark roots twist through cracks in the stone and wind beneath the wooden supports. Deep wagon ruts cross the packed earth, disappearing beneath scattered rubble. Nothing moves among the abandoned equipment.
This natural cavern was enlarged to serve as a maintenance and storage area for the log chute. Workers stored tools, replacement parts, and equipment here, away from the weather.
More recently, the cave also served as a staging area for excavation supplies destined for the Lower Works. The mixture of logging and mining equipment provides another opportunity for the party to discover that Reiver's Right was engaged in more than timber production.
There are no creatures or combat encounters in this cave. The party can explore freely, investigate the abandoned equipment, recover useful supplies, and examine records left behind by the workers.
The cave contains four areas: the entrance and maintenance supplies, the main storage chamber, the surveyor's alcove, and the lower storage niche. Each contains items or evidence that reward investigation.
Use the accompanying cave investigation narrative for individual area descriptions, skill checks, discoveries, and treasure.
The equipment, hauling records, and survey sketches provide further evidence of a substantial excavation concealed beneath the camp's logging operations. The unusual gray clay and corrupted roots suggest that work extended deep into the bluff.
The cave is accessible outer storage and staging space. The former hoist connection from the log chute into the Lower Works is the completely collapsed western access tunnel; it is impassable. Neither this cave nor its storage niches bypass the collapse.
The party must continue exploring Reiver's Right to locate a usable underground entrance.