Courtyard of Passage
Map Overview
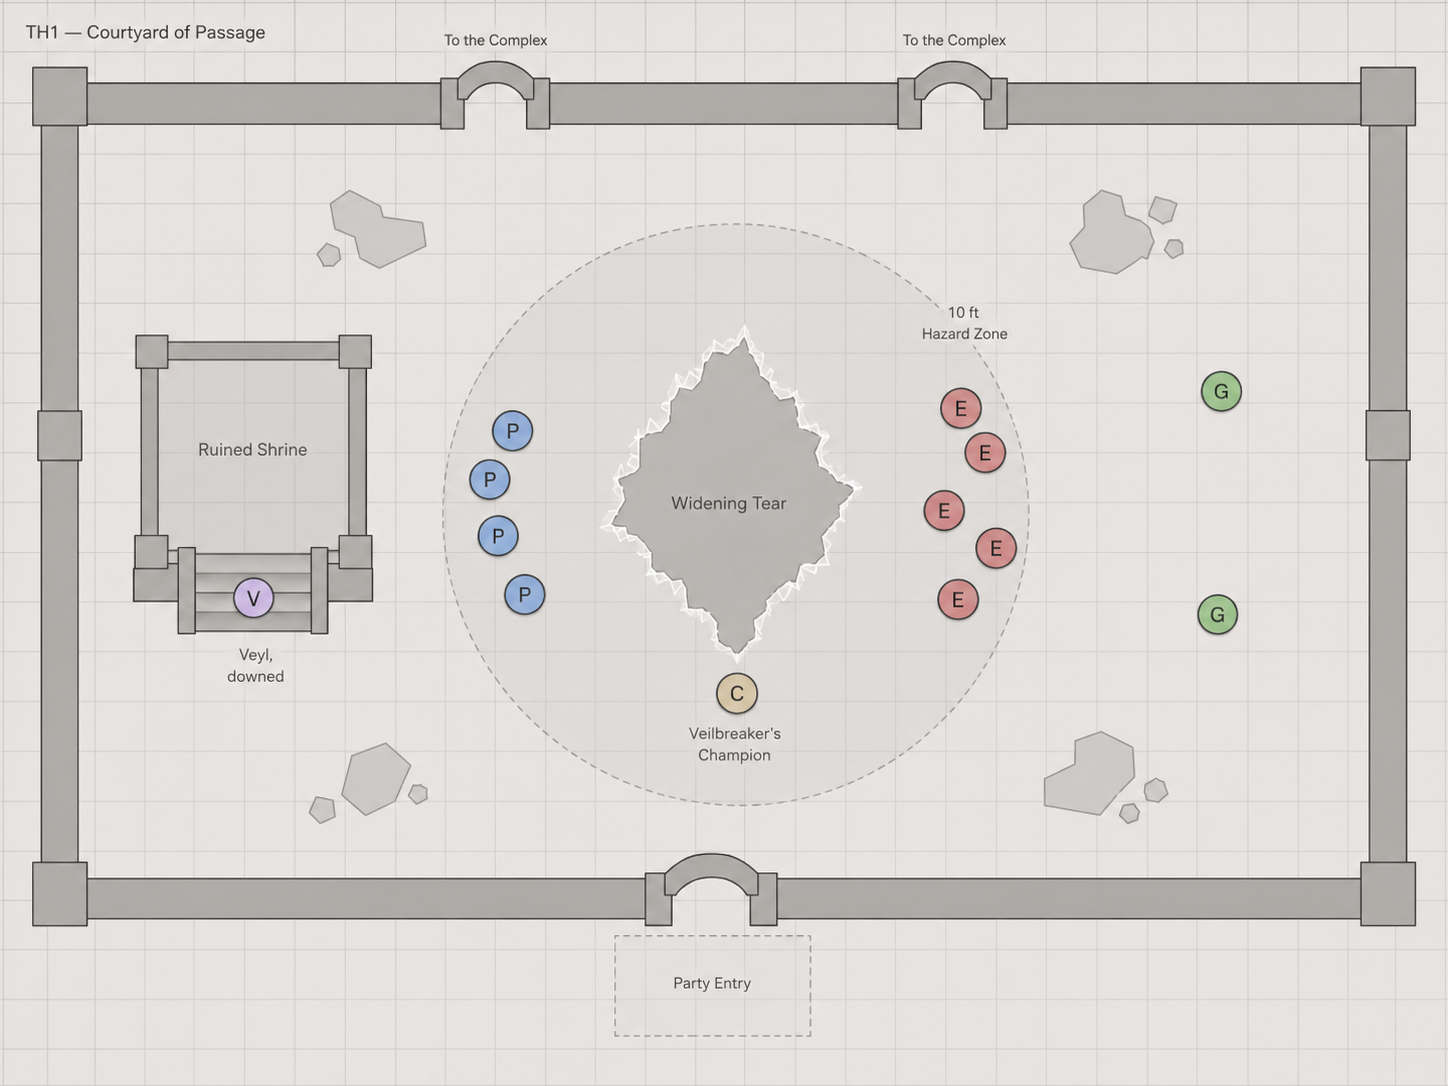
The map depicts the enclosed courtyard at the entrance to the Threshold of Souls. The heroes enter through the broad archway in the southern wall. Two exits stand opposite them to the north, but reaching either one means crossing a battlefield already slipping into chaos.
The jagged shape near the center of the courtyard marks the Widening Tear. The dashed circle around it shows the tear’s initial 10-foot hazard zone. This boundary does not remain fixed. As the rupture expands during the encounter, move or redraw the edge of the danger zone to match its new size.
Important Locations
- Party Entry
- The heroes enter through the southern archway. From here, they can see Veyl lying near the ruined shrine, the Veilbreaker’s Champion waiting ahead, and the larger battle raging around the central tear.
- Widening Tear
- The planar rupture hangs above a patch of shattered flagstones near the center of the courtyard. Creatures that stray too close feel it pulling at their bodies and thoughts. Anyone dragged into the heart of the tear disappears into the Gray.
- Ruined Shrine
- The structure along the western wall is all that remains of a small funerary shrine. Its cracked pillars, low walls, and broad steps provide cover and break lines of sight. The shrine also offers the safest route to Veyl without approaching the tear directly.
- Northern Exits
- The two archways in the northern wall lead toward the Hall of Weighing and the deeper portions of the Threshold. Both are visible from the entrance, though the Champion and the widening tear make a direct rush across the courtyard dangerous.
Map Tokens
| Marker | Represents | Starting Position |
|---|---|---|
| V | Veyl, wounded morrigna defender | Collapsed on the steps of the ruined shrine |
| C | The Veilbreaker’s Champion | South of the tear, between the heroes and Veyl |
| P | Psychopomp defenders | Holding the western side of the courtyard |
| E | Twisted echoes | Pressing into the courtyard from the east |
| G | Threshold Guardians | Engaged on the eastern side until Round 3 |
Using the Battlefield
The courtyard is deliberately open. Its danger comes less from walls and narrow passages than from the shrinking amount of safe ground. As the tear expands, the heroes must decide whether to engage the Champion, reach the wounded Veyl, or push toward the northern exits before their route is cut off.
Scattered rubble and broken flagstones can be treated as difficult terrain where marked. The ruined shrine provides the best cover in the courtyard and gives cautious characters a route around the western edge of the tear. The Champion understands this and may move to block the shrine if the heroes attempt to reach Veyl.